You’ve decided to start your own web hosting business. You’ve got your server. You’ve chosen WHMCS as your billing and automation platform.
Now what?
WHMCS (Web Host Manager Complete Solution) is the industry’s most powerful hosting automation platform — but its sheer number of settings, modules, and configuration options can overwhelm any beginner.
This guide cuts through the complexity. By the end, you’ll have a fully configured WHMCS installation ready to accept real customers and automate your hosting business.
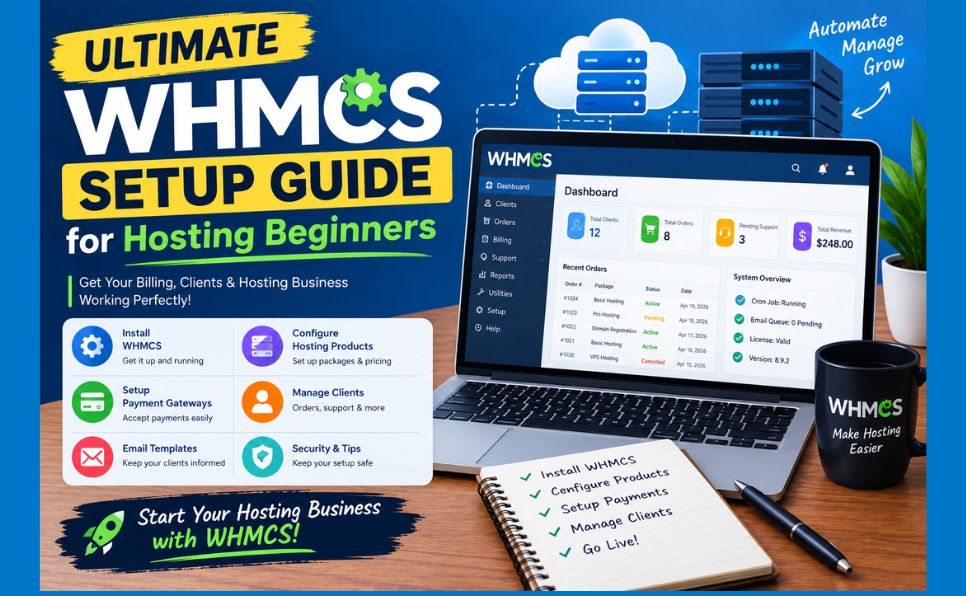
In this complete setup guide, you’ll learn:
- How to install WHMCS correctly
- Essential configuration settings every hosting business needs
- How to set up products and pricing
- How to connect payment gateways
- How to configure email templates
- How to integrate WHMCS with cPanel/WHM
- How to go live safely
- Common setup mistakes — and how to avoid them
Let’s build your hosting business. 👇
What You Need Before Starting
Before installing WHMCS, make sure you have:
| Requirement | Detail |
|---|---|
| WHMCS license | Purchase from whmcs.com — Starter ($15.95/mo) or Plus ($26.95/mo) |
| Web hosting | A server or reseller hosting account (separate from what you’ll sell) |
| Domain name | For your hosting company website |
| cPanel/WHM access | To connect WHMCS with your hosting infrastructure |
| SSL certificate | HTTPS is mandatory for any billing system |
| Payment gateway account | PayPal, Stripe, or similar |
| SMTP email | For sending invoices, tickets, and notifications |
📖 New to WHMCS? Read our introduction first: What Is WHMCS? Complete Beginner’s Guide for Web Hosting
📖 Make sure your hosting infrastructure is solid: Shared Hosting vs VPS vs Cloud Hosting: Which to Choose
Step 1: Download and Install WHMCS
Download WHMCS
- Log in to your account at whmcs.com
- Go to My Account → Downloads
- Download the latest WHMCS version (ZIP file)
Upload to Your Server
Via cPanel File Manager:
cPanel → File Manager → public_html →
Upload WHMCS ZIP file →
Right-click → Extract →
Move all files to desired directory
Recommended installation path:
yourdomain.com/billing/
OR
billing.yourdomain.com/ (subdomain)
Never install WHMCS in your root directory (public_html) if your main website is there.
Create a MySQL Database
cPanel → Databases → MySQL Databases →
Create new database: yoursite_whmcs →
Create new user with strong password →
Add user to database → All Privileges
Note down:
- Database name
- Database username
- Database password
- Database host (usually
localhost)
Run the Installation Wizard
Navigate to your WHMCS installation URL in your browser:
yourdomain.com/billing/install/install.phpFollow the wizard:
Step 1 — License Check: Enter your WHMCS license key from whmcs.com
Step 2 — System Check: WHMCS verifies PHP version, extensions, and folder permissions. Fix any red items before proceeding.
Required PHP extensions:
- cURL ✅
- MySQL/PDO ✅
- GD Library ✅
- ionCube Loader ✅ (Critical — install first if missing)
- Mbstring ✅
- OpenSSL ✅
Step 3 — Database Setup: Enter your database credentials
Step 4 — Admin Account: Create your WHMCS administrator account
First Name: Your Name
Last Name: Your Last Name
Email: admin@yourdomain.com
Password: Strong password (save this!)
Step 5 — Complete Installation: Click Install and wait 30–60 seconds
Step 6 — Delete Install Folder (CRITICAL SECURITY STEP)
cPanel → File Manager → public_html/billing/install →
Delete this entire folder immediately
Leaving the install folder accessible is a serious security vulnerability.
Step 2: Essential General Configuration
After installation, log in to WHMCS Admin:
yourdomain.com/billing/admin/Configure General Settings
WHMCS Admin → Setup → General SettingsWork through each tab:
General Tab:
Company Name: Your Hosting Company Name
Domain: yourdomain.com
Logo URL: Upload your logo
WHMCS System URL: https://yourdomain.com/billing
Localisation Tab:
Default Language: English
Default Country: Your country
Currency: USD (or your primary currency)
Date Format: d/m/Y or m/d/Y
Time Zone: Your local timezone
Mail Tab (Critical):
Mail Type: SMTP (recommended for deliverability)
SMTP Host: mail.yourdomain.com
SMTP Port: 587 (STARTTLS) or 465 (SSL)
SMTP Username: admin@yourdomain.com
SMTP Password: Your email password
From Name: Your Hosting Company
From Email: billing@yourdomain.com
Click “Test Connection” to verify email works before saving.
Invoices Tab:
Tax Label: VAT / GST / Tax (based on your location)
Invoice Number Format: INV-{YEAR}-{NUM}
Due Date: 7 days (recommended)
Auto Invoice: 14 days before due date
Security Tab:
Password Reset: Enable
Two-Factor Authentication: Enable (for admin accounts)
Session Timeout: 30 minutes
Step 3: Set Up Your Currency
WHMCS Admin → Setup → Currencies- Your default currency was set during installation
- Add additional currencies if serving international customers
- Update exchange rates regularly (or enable automatic updates)
For automatic exchange rate updates:
Setup → Automation Settings →
Exchange Rate Updates: Daily
Step 4: Configure Payment Gateways
Payment gateways allow WHMCS to accept money from customers automatically.
WHMCS Admin → Apps & Integrations →
Browse Apps → Payment Gateways
Setting Up PayPal:
- Click on PayPal Checkout
- Click Activate
- Enter your PayPal Client ID and Secret (from developer.paypal.com)
- Enable IPN (Instant Payment Notification)
- Set IPN URL in your PayPal account:
https://yourdomain.com/billing/modules/gateways/callback/paypalpro.phpSetting Up Stripe:
- Click on Stripe
- Click Activate
- Enter your Stripe Publishable Key and Secret Key (from stripe.com dashboard)
- Set up Stripe Webhooks pointing to your WHMCS installation
Recommended Payment Gateway Setup:
| Gateway | Best For | Transaction Fee |
|---|---|---|
| PayPal | Global customers, easy setup | 2.9% + $0.30 |
| Stripe | Credit/debit cards, professional | 2.9% + $0.30 |
| Payoneer | International, lower fees | Variable |
| Bank Transfer | Large orders, B2B | None |
Enable at least 2 payment methods — customers will leave if their preferred payment option isn’t available.
Step 5: Set Up Products and Services
This is where you define what you’re selling.
WHMCS Admin → Setup → Products/ServicesCreate a Product Group First:
Create Product Group →
Group Name: Web Hosting Plans
Headline: Fast, Reliable Web Hosting
Create Your First Hosting Product:
Create New Product →
Product Type: Hosting Account
Product Group: Web Hosting Plans
Product Name: Starter Hosting
Pricing Tab:
Payment Type: Recurring
Pricing:
Monthly: $4.99
Quarterly: $13.99
Semi-Annually: $26.99
Annually: $49.99
Module Settings Tab (Critical — connects to cPanel/WHM):
Module Name: cPanel
Username: WHM root username
Password: WHM root password or API token
Server: your server IP or hostname
Secure: Yes (HTTPS)
Test the connection — green checkmark confirms WHMCS can communicate with your server.
Details Tab:
Welcome Email: Hosting Account Welcome Email
Description: Write your product description here
Disk/Bandwidth Limits:
Disk Space: 10000 (MB) for 10GB
Bandwidth: 100000 (MB) for 100GB
Repeat this process for each hosting plan you want to sell (Basic, Pro, Business, etc.).
Step 6: Configure Servers (cPanel/WHM Integration)
WHMCS Admin → Setup → ServersAdd Your Server:
Add New Server →
Name: Main Hosting Server
Hostname: server.yourdomain.com
IP Address: Your server IP
Type: cPanel
Username: root (or WHM admin user)
Password/API Token: Your WHM password or API hash token
Using API Token (More Secure — Recommended):
In WHM: Home → Development → Manage API Tokens →
Create New Token: WHMCS_Token →
Copy the token →
Paste in WHMCS Server configuration
Test the Connection:
After saving, click “Test Connection” — you should see:
Success! Connection to server established.Server Groups (For Multiple Servers):
If you have multiple servers:
Setup → Server Groups →
Create Group: Shared Hosting Servers →
Add servers to group →
Assign products to server group
WHMCS will automatically distribute new accounts across servers when one reaches capacity.
Step 7: Configure Email Templates
WHMCS sends dozens of automated emails — welcome messages, invoices, support tickets, and more. Customize them to match your brand.
WHMCS Admin → Setup → Email TemplatesMost Important Email Templates to Customize:
| Template | When Sent | Priority |
|---|---|---|
| Hosting Account Welcome Email | New account created | 🔴 Critical |
| New Invoice Created | Invoice generated | 🔴 Critical |
| Payment Confirmation | Payment received | 🔴 Critical |
| Support Ticket Opened | Customer submits ticket | 🟡 Important |
| Account Suspension | Account suspended for non-payment | 🟡 Important |
| Password Reset | Customer requests password reset | 🟡 Important |
Customize the Welcome Email:
Click Hosting Account Welcome Email → Edit:
Subject: Welcome to [YOUR COMPANY] — Your Hosting Account Details

Body:
Dear {$client_name},

Welcome to [YOUR COMPANY NAME]! Your hosting account has been set up and is ready to use.

Here are your account details:

Domain: {$service_domain}
Username: {$service_username}
Password: {$service_password}
Server: {$service_server_name}
cPanel URL: https://{$service_domain}/cpanel

If you need any help getting started, our support team is available 24/7.

Best regards,
[YOUR COMPANY NAME]
Step 8: Set Up the Client Area (Front End)
Your WHMCS client area is what customers see. Customize it to match your brand.
Choose a Template:
WHMCS Admin → Setup → General Settings →
Template: Six (default modern template)
Popular WHMCS templates in 2026:
- Six — Default, modern, mobile-responsive ✅ (recommended for beginners)
- Lagom — Popular premium template
- WHMCS Bridge — For WordPress integration
Customize Colors and Logo:
WHMCS Admin → Setup → General Settings →
Logo URL: Upload your logo
Primary Color: Your brand color (hex code)
Configure the Client Portal:
Setup → General Settings → Clients Tab →
Require Email Verification: Yes
Allow Client Registration: Yes
Default Client Group: Default
Step 9: Configure Support System
WHMCS includes a built-in ticketing system for customer support.
WHMCS Admin → Support → Support DepartmentsCreate Support Departments:
Add Department:
Name: Technical Support
Email: support@yourdomain.com
Response Address: support@yourdomain.com

Add Department:
Name: Billing
Email: billing@yourdomain.com

Add Department:
Name: Sales
Email: sales@yourdomain.com
Configure Ticket Settings:
Setup → General Settings → Support Tab →
Support System Status: Enabled
Days to Auto Close: 7
Send Satisfaction Survey: Yes
Step 10: Set Up Automation (Cron Job)
WHMCS requires a cron job to run automated tasks — invoicing, suspension, account creation, and more.
Configure the Cron Job in cPanel:
cPanel → Advanced → Cron Jobs →
Common Settings: Once Per Minute →
Command:
php -q /home/username/public_html/billing/crons/cron.php
Replace /home/username/public_html/billing/ with your actual WHMCS installation path.
Verify Cron is Running:
WHMCS Admin → Utilities → Cron Log →
Should show entries running every 5 minutes
If cron isn’t running, all automation stops — invoices won’t generate, accounts won’t suspend, and welcome emails won’t send.
Step 11: Configure Domain Registration (Optional)
If you want to sell domain names alongside hosting:
WHMCS Admin → Setup → Domain RegistrarsPopular registrar integrations:
- ResellerClub / LogicBoxes — most popular for WHMCS resellers
- Enom — established reseller platform
- Namecheap — developer-friendly API
- Cloudflare Registrar — cost-price domains
Activate Registrar →
Enter API credentials →
Test Connection →
Setup → Products/Services → Domains →
Configure TLD pricing
📖 Learn about domain names and their role in web hosting: How to Choose a Domain Name
Step 12: Security Configuration
WHMCS handles real money and customer data — security is non-negotiable.
Essential Security Steps:
1. Rename the Admin Directory:
cPanel → File Manager →
Rename /billing/admin/ to something unique:
/billing/myhostingadmin2026/

Update in WHMCS:
Setup → General Settings → General Tab →
Admin Directory: myhostingadmin2026
2. Restrict Admin Access by IP:
cPanel → Security → IP Blocker →
Add .htaccess rule to admin folder:

order deny,allow
deny from all
allow from YOUR.IP.ADDRESS.HERE
3. Enable Two-Factor Authentication:
My Account → Security Settings →
Enable 2FA → Scan QR code with authenticator app
4. Configure Fraud Protection:
Apps & Integrations → Fraud Protection →
MaxMind (free tier available) →
Enter API key → Enable
5. Regular Backups:
Setup → General Settings → Security Tab →
Enable database backups →
Configure backup email address
Step 13: Go Live Checklist
Before accepting real customers, verify everything works:
Technical Checks:
- WHMCS accessible via HTTPS (not HTTP)
- SSL certificate valid and installed
- Cron job running (check Cron Log)
- Install folder deleted
- Admin directory renamed
- Test payment — place a real order and pay
Product Checks:
- At least one product created and published
- Product pricing configured correctly
- Module settings tested — can create cPanel account automatically
- Welcome email template customized
- Invoice template branded
Payment Checks:
- At least one payment gateway active
- Test transaction completed successfully
- IPN/Webhook notifications working
- Refund process understood
Support Checks:
- Support departments created
- Ticket email routing working
- Auto-response emails configured
Communication Checks:
- SMTP email sending successfully
- All critical email templates customized
- Company name and logo in all templates
Common WHMCS Setup Mistakes to Avoid
❌ Mistake 1: Not Deleting the Install Folder
Leaving /install/ accessible is the most critical security mistake. Delete it immediately after installation.
❌ Mistake 2: Using Root WHM Credentials
Instead of using root credentials to connect WHMCS to your server, create a dedicated WHM reseller account or use API tokens. This limits damage if credentials are compromised.
❌ Mistake 3: Not Testing Automation Before Going Live
Run test orders through the entire process — from order placement to account creation — before accepting real customers. Automation failures at launch destroy first impressions.
❌ Mistake 4: Skipping Email Configuration
Using PHP mail instead of SMTP leads to poor email deliverability. Customers won’t receive invoices or welcome emails, leading to confusion and support tickets.
❌ Mistake 5: Not Setting Up the Cron Job
Without the cron job, WHMCS is manual. Invoices won’t generate, accounts won’t suspend for non-payment, and welcome emails won’t send automatically.
❌ Mistake 6: Forgetting SSL
Never run a billing system on HTTP. Install SSL before launching — customers will never enter payment information on an insecure site.
📖 Fix technical errors that arise during setup: How to Fix Common cPanel Errors: A Webmaster’s Survival Guide
WHMCS Useful Add-ons for Beginners (2026)
| Add-on | Purpose | Cost |
|---|---|---|
| WHMCS Security Guard | Enhanced admin security | Free |
| iThemes Security | WordPress integration security | Free/Paid |
| GoCardless | Direct debit payments | Per transaction |
| WHMCS.community | Free modules and templates | Free |
| ModulesGarden | Premium server modules | Paid |

Conclusion — Your WHMCS Hosting Business Is Ready
Setting up WHMCS properly takes a few hours — but it’s a one-time investment that automates your hosting business for years.
Your launch sequence:
- ✅ Install WHMCS and delete install folder
- ✅ Configure general settings and email (SMTP)
- ✅ Set up payment gateways (PayPal + Stripe minimum)
- ✅ Create your hosting products
- ✅ Connect to cPanel/WHM server
- ✅ Customize email templates
- ✅ Configure cron job
- ✅ Run security hardening steps
- ✅ Test complete order flow
- ✅ Go live and accept customers
A properly configured WHMCS installation handles invoicing, account creation, suspension, and customer support automatically — freeing you to focus on growing your hosting business.
Frequently Asked Questions (FAQ)
How much does WHMCS cost in 2026?
WHMCS offers two main plans: Starter at $15.95/month (up to 250 clients) and Plus at $26.95/month (unlimited clients with additional features). An owned license option is available for $19.95/month with a one-time setup. All plans include automatic updates and support.
Yes — WHMCS can be installed on shared hosting, though a VPS or dedicated server is recommended for production hosting businesses. Shared hosting may have performance limitations as your client base grows. Most shared hosts support the required PHP extensions.
How long does WHMCS setup take?
A basic functional setup takes 2–4 hours for beginners. Full configuration including custom templates, multiple products, domain registration, and branding customization typically takes 8–16 hours spread across 2–3 days.
Does WHMCS work with any hosting control panel?
WHMCS natively supports cPanel/WHM, DirectAdmin, Plesk, and several other control panels through official modules. Community modules extend support to additional panels. cPanel/WHM integration is the most mature and well-tested.
Can WHMCS handle multiple servers?
Yes — WHMCS supports unlimited servers through its server management system. You can create server groups, and WHMCS will automatically assign new accounts across servers based on capacity. This makes scaling your hosting business straightforward.
What’s the difference between WHMCS and a regular website?
WHMCS is a complete hosting business management platform — not just a website. It handles billing, invoicing, automated account provisioning, support tickets, domain management, and customer management in one integrated system. You typically use WHMCS alongside your main website, not instead of it.
Found this guide helpful? Share it with someone starting a hosting business. Have a question about WHMCS setup? Drop it in the comments — we answer every one!